활용할 부트스트랩
SB Admin 2 - Free Bootstrap Admin Theme
A free Bootstrap admin theme, dashboard, or web application UI. All Start Bootstrap templates are free to download and open source.
startbootstrap.com

다운 후 static 파일들, 템플릿 파일들을 분리하는 작업을 하자
참고로
Static file은 Javascript, CSS, Image 파일처럼 웹 서비스에서 사용하려고 미리 준비해 놓은 정적 파일입니다. 파일 자체가 고정되어 있고, 서비스 중에도 수시로 추가되거나 변경되지 않고 고정되어 있습니다
[장고 입문] 8. static 개념 설명
웹 서비스 내부 데이터 1. static : 개발자가 웹 서비스 내부에서 미리 준비. css, js, img 2. media : 사용자가 업로드한 데이터 settings.py에서 다음 3개에서 static파일을 관리함 STATICFILES_DIRS : stati..
0ver-grow.tistory.com
이후 다음 과장 진행
1. 가상환경설치 및 실행
2. 장고 설치
3. 프로젝트 및 앱 설치
4. 기본세팅하기
프로젝트폴더 > urls.py
from django.contrib import admin
from django.urls import path
from commuapp import views

urlpatterns = [
    path('admin/', admin.site.urls),
    path('', views.home, name='home')
]
프로젝트폴더 > settings.py
INSTALLED_APPS = [
    'django.contrib.admin',
    'django.contrib.auth',
    'django.contrib.contenttypes',
    'django.contrib.sessions',
    'django.contrib.messages',
    'django.contrib.staticfiles',
    'commuapp',
]
5. 최상위 폴더에 static 폴더 생성

6. settings.py에 static 폴더 위치 지정
STATICFILES_DIRS = [
    BASE_DIR / 'static'
]
7. base.html로 중복되는 코드 최소화
[장고 입문] 11. HTML 템플릿 언어 활용 / extends 템플릿 상속으로 중복코드관리
HTML에서 템플릿 태그를 통해 어떻게 URL 사이를 이동시킬지 배워보자 템플릿 상속이라는 개념을 통해 어떻게 하면 이 HTML을 효율적으로 활용할 수 있는지를 배우자 템플릿 언어로 html 지정하기 1,
0ver-grow.tistory.com
8 .base.html의 링크들을 static폴더로 변경
[장고 실전] 1. 카페앱 만들기
우선 기본적으로 1. 가상환경 설치 / 실해 2. 장고설치 3. 프로젝트 및 앱 설치 4. 프로젝트폴더 > settings.py 앱 등록 5. 프로젝트폴더 > urls.py : url, 함수 연결 6. 앱 폴더 > views.py : 함수 및 연결 html..
0ver-grow.tistory.com
9. DB 초기화 : python manage.py migrate
10. 앱 > models.py 테이블 정의
from django.db import models
from django.conf import settings

# 게시물 모음
class Post(models.Model) :
    title = models.CharField(max_length=200)
    body = models.TextField()
    date = models.DateTimeField(auto_now_add=True)

    # 게시글 작성시 DB에 title이 나오도록함
    def __str__(self) :
        return self.title
작성 후 DB 반영
$ python manage.py makemigrations
$ python manage.py migrate
11. 앱 > admin.py : admin 사이트에서 테이블 확인하기
from django.contrib import admin
from .models import Post

admin.site.register(Post)
12, admin페이지에 테이블 세팅 됐는지 확인
13. index.html : table.html의 일부를 가져올 것
{% extends 'base.html' %}

{% block content %}
                    <!-- DataTales Example -->
                    <div class="card shadow mb-4">
                        <div class="card-header py-3">
                            <h6 class="m-0 font-weight-bold text-primary">DataTables Example</h6>
                        </div>
                        <div class="card-body">
                            <div class="table-responsive">
                                <table class="table table-bordered" id="dataTable" width="100%" cellspacing="0">
                                    <thead>
                                        <tr>
                                            <th>Name</th>
                                            <th>Position</th>
                                            <th>Office</th>
                                            <th>Age</th>
                                            <th>Start date</th>
                                            <th>Salary</th>
                                        </tr>
                                    </thead>
                                    <tfoot>
                                        <tr>
                                            <th>Name</th>
                                            <th>Position</th>
                                            <th>Office</th>
                                            <th>Age</th>
                                            <th>Start date</th>
                                            <th>Salary</th>
                                        </tr>
                                    </tfoot>
                                    <tbody>
                                        <tr>
                                            <td>Tiger Nixon</td>
                                            <td>System Architect</td>
                                            <td>Edinburgh</td>
                                            <td>61</td>
                                            <td>2011/04/25</td>
                                            <td>$320,800</td>
                                        </tr>
                                    </tbody>
                                </table>
                            </div>
                        </div>
                    </div>

                </div>
                <!-- /.container-fluid -->
{% endblock %}
글쓰기 기능 추가하기
13. index.html : 글쓰기 버튼추가하기
button.html에서 다음 코드를
index.html의 최하단에 넣자.
                        <div class="card-body">

                            <a href="#" class="btn btn-primary btn-icon-split">
                                <span class="icon text-white-50">
                                    <i class="fas fa-flag"></i>
                                </span>
                                <span class="text">Split Button Primary</span>
                            </a>
</div> 
이 버튼에 글쓰기 기능을 넣자

14. urls.py
postcreate 추가하기
from django.contrib import admin
from django.urls import path
from commuapp import views
urlpatterns = [
path('admin/', admin.site.urls),
path('', views.home, name='home'),
path('/postcreate', views.postcreate, name='postcreate'),
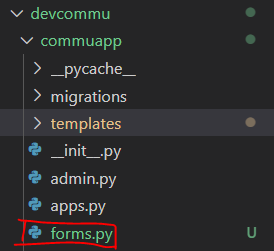
]15. 앱 > forms.py 생성 : 입력값 받는 클래스,객체 생성하여 DB에 반영
사용자로 부터 입력값을 받는 3가지 방법(html, django_Form, django_modelForm) 중 django_modelForm을 쓸 것
from django import forms
from .models import Post # 모델기반이므로

# forms의 ModelForm을 상속받아 만듦
class PostForm(forms.ModelForm):
    class Meta :
        model = Post
        fields = '__all__'
16. 앱 > views.py 글쓰기 기능동작하는 함수만들기
from django.shortcuts import render
from .forms import PostForm # forms.py의 PostForm객체 불러오기

# Create your views here.
def home(request) :
    return render(request, 'index.html')

def postcreate(request) :
    # request method가 POST
    if request.method == 'POST' :
        pass
        # 입력값 저장

    # request method가 GET
    # form 입력 html 띄우기
    else :
        form = PostForm() # forms.py의 PostForm객체클래스
    return render(request, 'post_form.html', {'form':form})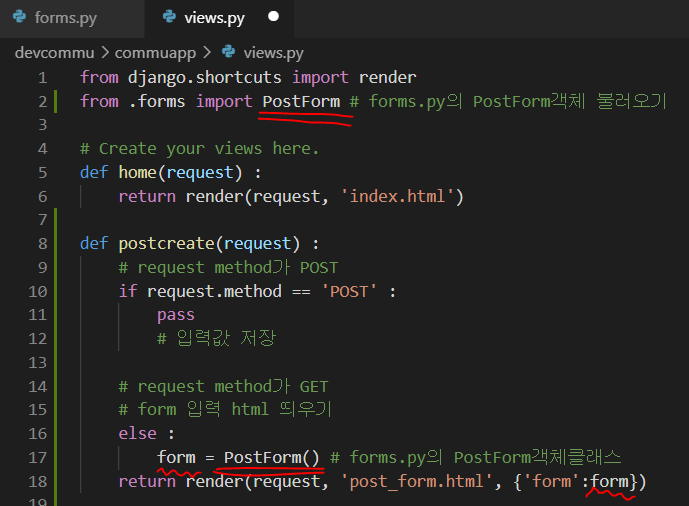
17. 앱 > 템플릿 > post_form.html : 앱 > views.py > postcreate함수에서 렌더링할 페이지
{% extends 'base.html' %}
{% block content %}

<h1> 새글 작성 </h1>

<!-- entype : 첨부파일도 넣을 수 있도록 -->
<form action="" method="POST" enctype="multipart/form-data">
        {% csrf_token %}
        <!--table형태의 form인 form.as_table | 만약 일반 form은 form만 쓸 것-->
        <table>
            {{form.as_table}}
        </table>
        <input type="submit" value="새 글">
</form>
{% endblock %}
18. views.py : postcreate 함수
새글 버튼 클릭시 POST요청이 들어가도록 수정하자
from django.shortcuts import render, redirect
from .forms import PostForm # forms.py의 PostForm객체 불러오기

# Create your views here.
def home(request) :
    return render(request, 'index.html')

def postcreate(request) :
    # request method가 POST
    if request.method == 'POST' :
        # 입력값 저장
        form = PostForm(request.POST, request.FILES)
        if form.is_valid() :
            form.save()
            return redirect('home') # 저장후 home으로 url이동

    # request method가 GET
    # form 입력 html 띄우기
    else :
        form = PostForm() # forms.py의 PostForm객체클래스
    return render(request, 'post_form.html', {'form':form})
'○ WEB > 21.02 CodeLion_Django Web' 카테고리의 다른 글
| [장고 실전3] 3. 커뮤니티 : 댓글기능 구현 (0) | 2021.03.30 |
|---|---|
| [장고 실전3] 2. 커뮤니티 : 디테일 페이지 (0) | 2021.03.27 |
| [장고 실전2] 7. 블로그 : 로그인/로그아웃 (0) | 2021.03.16 |
| [장고 실전2] 6. 블로그 : 댓글 구현하기 (0) | 2021.03.16 |
| [장고 실전2] 5. 블로그 : 업로드 (0) | 2021.03.13 |


