A. 댓글 객체 구현하기
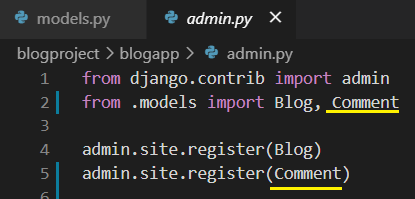
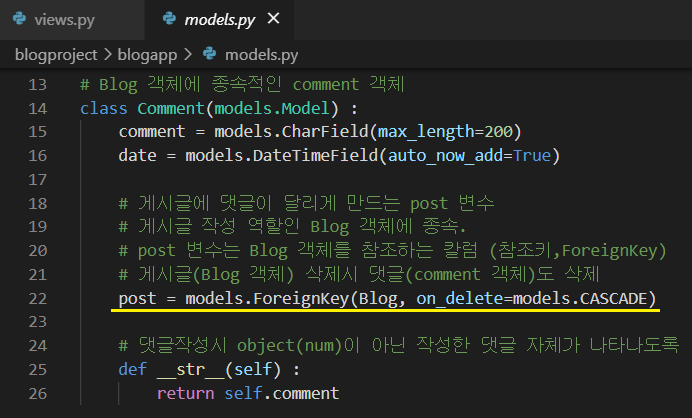
1. models.py : 댓글 객체 구현
댓글 객체 생성

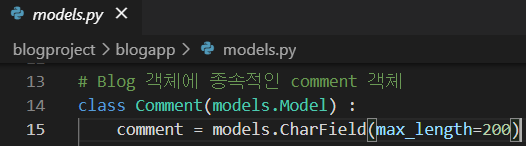
class Comment(models.Model) :
    comment = models.CharField(max_length=200)
    date = models.DateTimeField(auto_now_add=True)
    post = models.ForeignKey(Blog, on_delete=models.CASCADE)

    def __str__(self) :
        return self.comment
django 게시글 삭제시 댓글 자동삭제 옵션들
Django model ForeinkeyField on_delete
...
lee-seul.github.io
2. 수정한 객체를 DB에 반영하기
python manage.py makemigrations
python manage.py migrate
반영한 후
객체명을 수정하거나 객체안에 변수를 추가한 뒤에는 DB자체의 변형을 가지고 오는것이 아니므로 makemigrations, migrate를 할 필요가 없다.
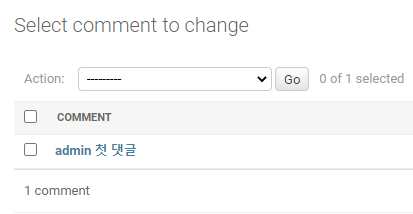
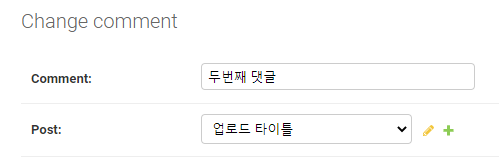
3. 댓글을 관리자 페이지에 등록하기
원래는 DB안 대상을 보려면 DB Client프로그램이 있어야 하지만 장고는 admin에서 확인이 가능하다.

admin에서 댓글을 작성한 모습
B. 게시글안에 댓글 기능 넣기
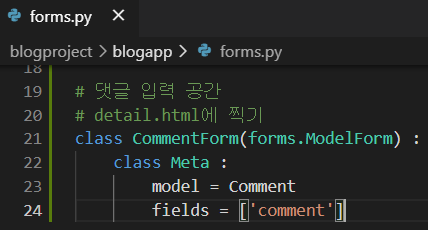
1. forms.py : 댓글 입력 공간인 comment 폼 만들기
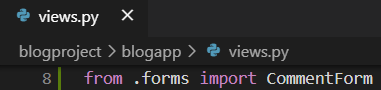
2. views.py : CommentForm 띄우기
CommentForm을 detail.html에 찍기 위해 detail 함수에 CommentForm 객체를 추가하자.

CommentForm객체는 comment_form 변수에 반영
3. detail.html : CommentForm 찍기
CommentForm객체가 반영된 comment_form 변수를 사용
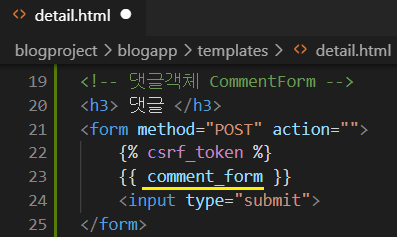
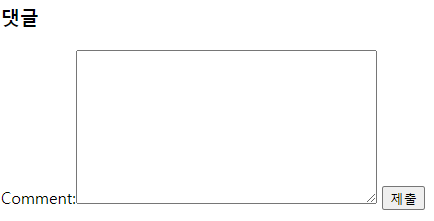
<h3> 댓글 </h3>
<form method="POST" action="">
    {% csrf_token %}
    {{ comment_form }}
    <input type="submit">
</form>
4. urls.py : 댓글 저장하는 url(name='create_comment') 추가하기
detail.html에서 입력한 댓글을 저장하는 url(name='create_comment') 추가하기

path('create_comment/<int:blog_id>', views.create_comment, name='create_comment'),<int:blog_id> 에 주목할 것
5. detail.html : create_comment 넣기
입력 댓글을 저장하는 ''create_comment'' url name을 넣어준다.
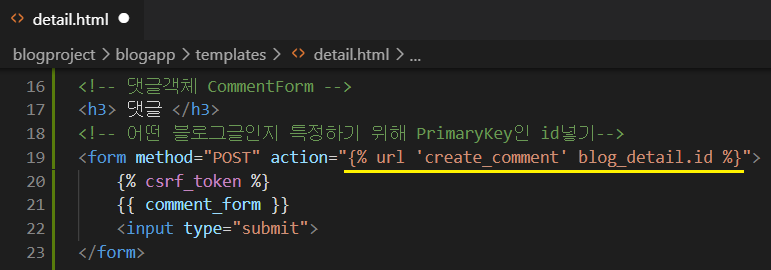
<h3> 댓글 </h3>
<form method="POST" action="{% url 'create_comment' blog_detail.id %}">
    {% csrf_token %}
    {{ comment_form }}
    <input type="submit">
</form>
6. views.py : create_comment 함수 만들기
앞서 urls.py에서 정수형 자료형인 <int : blog_id>을 활용하자

# 작성 댓글 저장
def create_comment(request, blog_id) :
    filled_form = CommentForm(request.POST)

    # commit=False : 아직은 저장히지 말고 대기하라는 의미
    if filled_form.is_valid() :
        finished_form = filled_form.save(commit=False)
        # 어떤 게시글의 댓글인지를 저장
        # post에다가 Blog 객체의 pk값이 blog_id인 것을 1개 담아줌
        finished_form.post = get_object_or_404(Blog, pk=blog_id)
        # 어떤 게시글의 댓글인지 저장됨
        finished_form.save()
    # blog_id 값을 가지고 있는 detail url로 이동한다.
    return redirect('detail', blog_id)
위 post는 models.py의 게시글의 댓글을 담은 Comment객체의 post변수를 의미
7. 댓글 기능 확인하기
아무 게시글에서 다음처럼 댓글을 작성

이후 admin페이지로 가서 확인하자

작성한 게시글의 제목도 정상적으로 참조됨
8. detail.html : 작성한 댓글 목록 띄우기

<!-- 게시글 작성하기 -->

<h1> 제목 </h1>
{{ blog_detail.title }}

<h2> 날짜 </h2>
{{ blog_detail.date }}

<h3> 본문 </h3>
{{ blog_detail.body }}

<!--업로드 사진 나타내기-->
<h3> 업로드 파일 </h3>
{% if blog_detail.photo %}
    {{ blog_detail.photo.url }}
    <img src="{{ blog_detail.photo.url }}" alt="" height="600">
{% endif %}

<hr>
<!-- 댓글객체 CommentForm -->
<h3> 댓글 </h3>
<!-- 어떤 블로그글인지 특정하기 위해 PrimaryKey인 id넣기-->
<form method="POST" action="{% url 'create_comment' blog_detail.id %}">
    {% csrf_token %}
    {{ comment_form }}
    <input type="submit">
</form>
<hr>
<!-- 댓글 목록 -->
<!-- 특정객체(blog_detail)를 참조(Foreign)하는 어떤 모델(comment)의 집합(_set.all) 불러오기-->
<!-- blog_detail을 참조하는 모든 댓글목록 가져오기 -->
{% for comment in blog_detail.comment_set.all %}
<p>{{ comment }} </p>
<hr>
{% endfor %}
실행화면

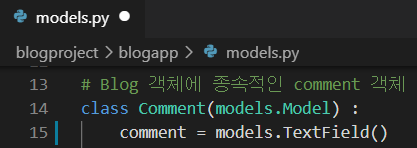
지금 작성하는 CommentField가 작다면
CharField -> TestField로 수정
실행화면
'○ WEB > 21.02 CodeLion_Django Web' 카테고리의 다른 글
| [장고 실전3] 1. 커뮤니티 : 기초작업, 새글작성하기 (0) | 2021.03.24 |
|---|---|
| [장고 실전2] 7. 블로그 : 로그인/로그아웃 (0) | 2021.03.16 |
| [장고 실전2] 5. 블로그 : 업로드 (0) | 2021.03.13 |
| [장고 실전2] 4. 블로그 : 쿼리셋, 입력한 데이터를 HTML에 표현하기 (0) | 2021.03.12 |
| [장고 실전2] 3. 블로그 : 작성한 글을 html에 띄우기 (0) | 2021.03.12 |


