소셜 로그인 구현

pip install django-allauth 설치
django-allauth로 가보자
django-allauth.readthedocs.io/en/latest/installation.html
Installation — django-allauth 0.43.0 documentation
Post-Installation In your Django root execute the command below to create your database tables: Now start your server, visit your admin pages (e.g. http://localhost:8000/admin/) and follow these steps: Add a Site for your domain, matching settings.SITE_ID
django-allauth.readthedocs.io

INSTALLED_APPS = [
    ...
    # The following apps are required:
    'django.contrib.auth',
    'django.contrib.messages',
    'django.contrib.sites',

    'allauth',
    'allauth.account',
    'allauth.socialaccount',
    # ... include the providers you want to enable:
settings.py에 위 항목을 추가하라고 나온다.
이 중 이미 입력된 것을 제외하고 추가한다.

django-allauth의 다큐먼트를 읽어보면
어떻게 사용하는지가 나온다.
우린 google 로그인을 구현할 것이므로 다음을 settings.py의 INSTALLED_APPS에 복붙해준다.
'allauth.socialaccount.providers.google',


마지막으로
SITE_ID = 1 을 입력


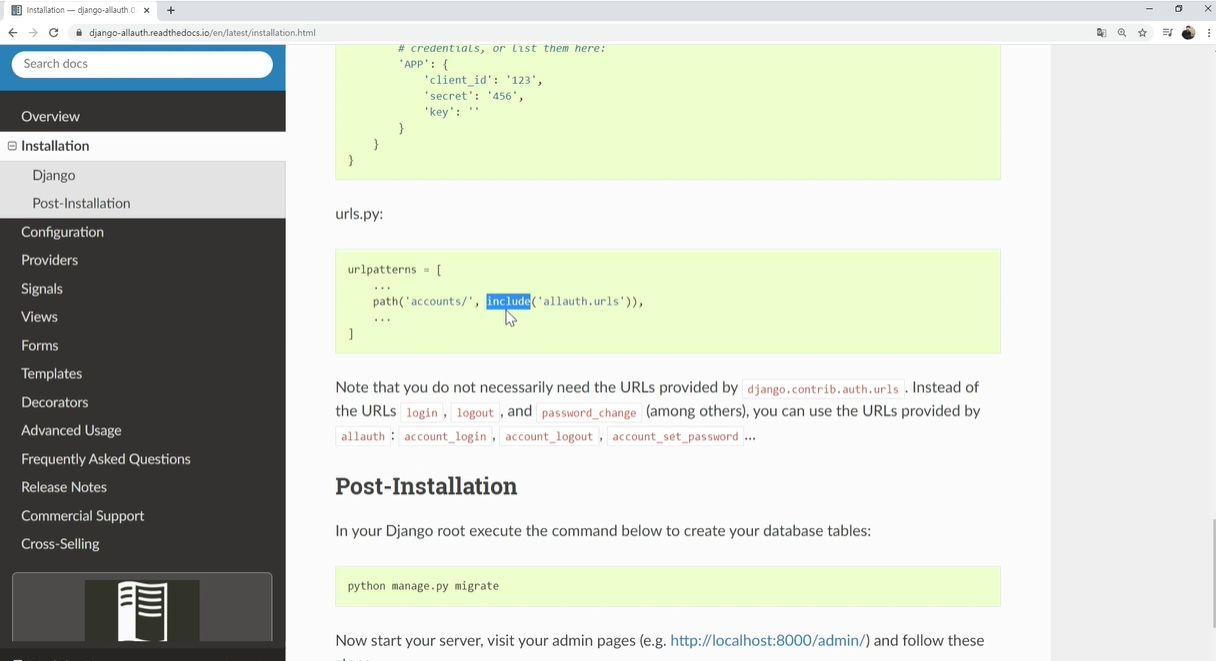
프로젝트 > urls.py
allauth path도 추가해주자
urlpatterns = [
    ...
    path('accounts/', include('allauth.urls')),
    ...
]


입력이 다 되었다면
python manage.py migrate로 갱신해주자.

로그인 창으로 가보니 다음처럼 뜬다.

관리자 화면으로 가보면
다음처럼 social accounts가 반영된 것을 확인할 수 있다.

sites 항목을 클릭하면 현재 도메인 이름이 example.com으로 나타나있다.
이걸 현재 도메인 주소인 127.0.0.1:8000로 수정한다


Social applications로 들어가자
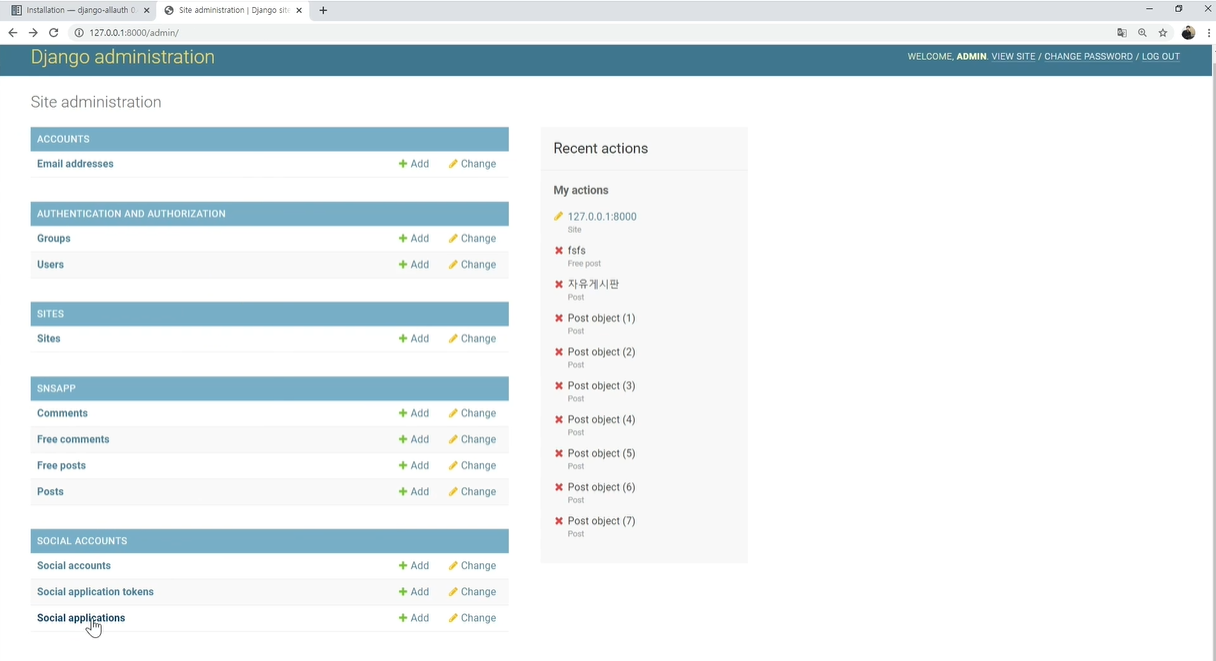
현재 구글 로그인만 추가했으므로 Provider에는 구글만 뜬다.
Name은 자유롭게 작성가능
그리고 Sites에서 127.0.0.1:8000을 왼쪽칸에서 우측칸으로 옮겨준다.
클라이언트 id, Secret key는 구글에서 받아야한다.

B. 구글 SNS 기능을 활성화 시키자
클라이언트 ID, Secret Key 부분을 채우기 위해
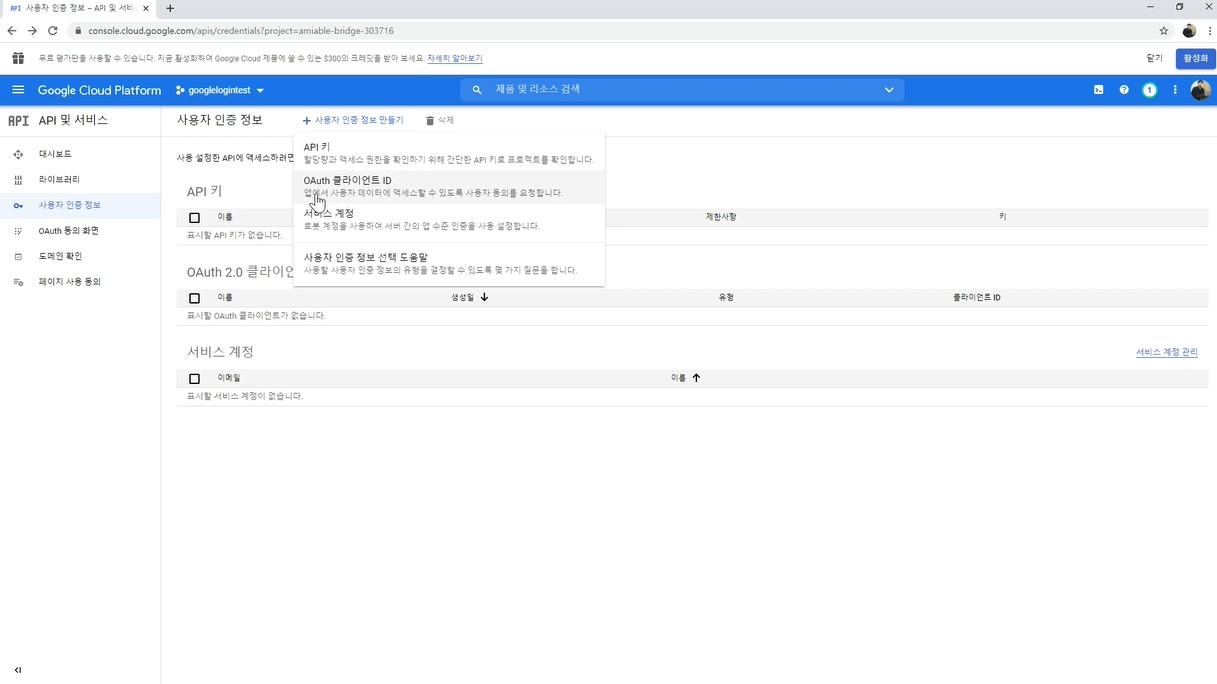
console.cloud.google.com으로 가자
Google Cloud Platform
There is a temporary block on your account. This happens when Google detects requests from your network that may have been sent by malicious software, a browser plug-in, or script that sends automated requests. Retry in a few minutes.
console.cloud.google.com
API 및 서비스로 이동
사용자 인증 정보 > 프로젝트 만들기

상단의 사용자 인증 정보 만들기 > OAuth 클라이언트 ID

동의 화면 구성 클릭 > 외부 클릭 > 만들기 클릭

<앱 정보>
앱 이름 : 자유
사용자 이메일 : 지금 내 지메일
<앱 도메인>
홈페이지 : http://127.0.0.1:8000
<개발자 연락처 정보>
내 이메일

여기까지 저장해주자.
그리고
사용자 인증 정보 > 상단의 OAuth 클라이언트 ID 클릭
애플리케이션 유형 : 웹 어플리케이션
URL 주소 : http://127.0.0.1:8000

하단의 승인된 리디렉션 URI는 django-allauth에 기재된 것을 작성해야 한다.
http://127.0.0.1:8000/accounts/google/login/callback/

Providers — django-allauth 0.43.0 documentation
Most providers require you to sign up for a so called API client or app, containing a client ID and API secret. You must add a SocialApp record per provider via the Django admin containing these app credentials. When creating the OAuth app on the side of t
django-allauth.readthedocs.io

http://127.0.0.1:8000/accounts/google/login/callback/만들어주면 이렇게 클라이언트 ID, 비밀번호가 형성된 것을 확인할 수 있다.

이를 우리 홈페이지 admin > Social applications에서 다음처럼 해주면 된다.
Available sites는 우측으로 이동
Provide : google
Name : 자유양식
Cliend id : 복붙
Secret Key : 복붙


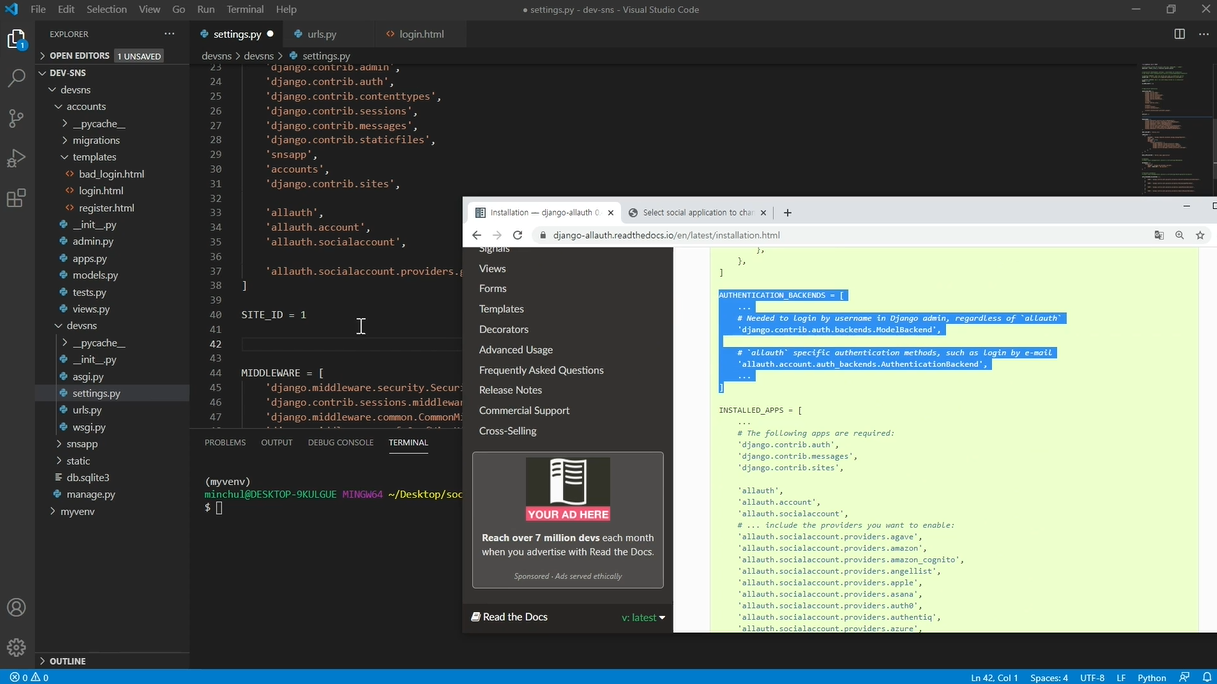
이제 settings.py로 가서 수정하기 위해 django allauth의 installation 페이지로 가자
Installation — django-allauth 0.43.0 documentation
Post-Installation In your Django root execute the command below to create your database tables: Now start your server, visit your admin pages (e.g. http://localhost:8000/admin/) and follow these steps: Add a Site for your domain, matching settings.SITE_ID
django-allauth.readthedocs.io
AUTHENTICATION_BACKENDS = [
    # Needed to login by username in Django admin, regardless of `allauth`
    # 기존 장고 인증기능
    'django.contrib.auth.backends.ModelBackend',

    # `allauth` specific authentication methods, such as login by e-mail
    # 소셜로그인 기능
    'allauth.account.auth_backends.AuthenticationBackend',
]
그리고 로그인 후 리다이렉션 위치를 홈페이지로 설정하자
LOGIN_REDIRECT_URL = '/'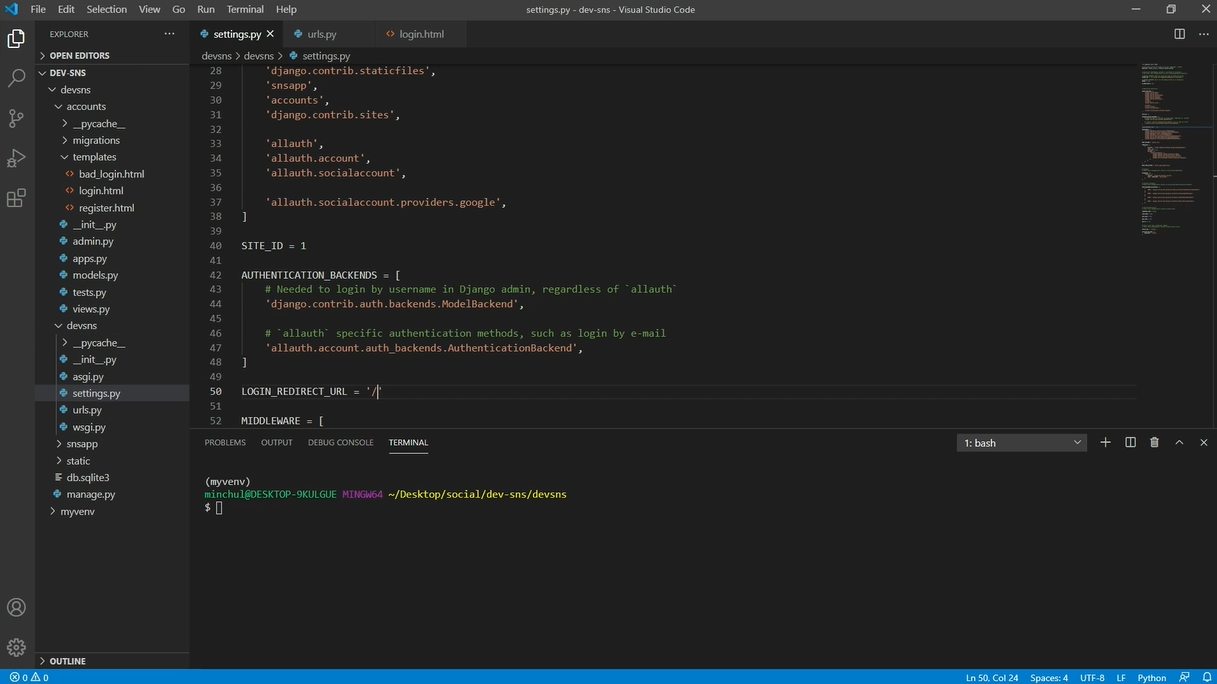
소셜 로그인을 하러 다음 URL을 입력하자
127.0.0.1:8000/accounts/login


정상적으로 소셜 로그인이 됐는지를 확인하기 위해
admin 페이지 > Social accounts를 클릭해서 확인.

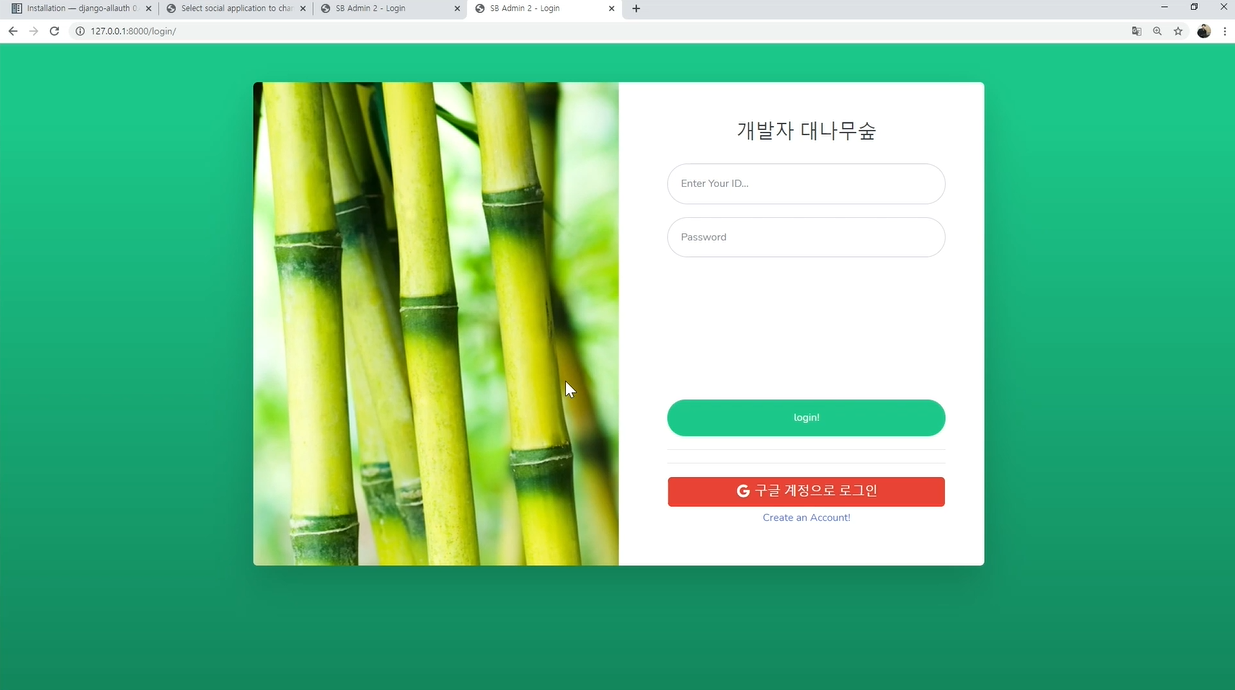
C. 이제 로그인 화면에서 구글 로그인을 할 수 있도록 만들자
django-allauth.readthedocs.io/en/latest/templates.html
Templates — django-allauth 0.43.0 documentation
© Copyright 2017, Raymond Penners Revision 35338621.
django-allauth.readthedocs.io
다음 코드 예시를 참고해서 구글 로그인 기능을 구현하자
{% load socialaccount %}

<a href="{% provider_login_url "openid" openid="https://www.google.com/accounts/o8/id" next="/success/url/" %}">Google</a>
<a href="{% provider_login_url "twitter" %}">Twitter</a>
로그인 화면을 구현하는 login.html로 가서 작성하자.
우선
{% load static %} 밑에 다음을 추가하자
{% load socialaccount %}

그리고
다음과 같은 디자인의 구글 로그인 창을 만드는 것이 목표이므로
해당 디자인 코드를 가지고 온 뒤

그리고 위 트위터 예시 코드를 참고해서 수정한다.
<a href="{% provider_login_url 'google' %}" class="btn btn-google btn-user btn-block">
                                            <i class="fab fa-google fa-fw"></i> Google login
                                        </a>
참고로 소셜 로그인을 할 때,
계정 선택 바로 하단에 있는 test3이 의미하는 것은
앞에서 Google Cloud Platform에서 작성한 앱이름이다.


'○ WEB > 21.02 CodeLion_Django Web' 카테고리의 다른 글
| [장고 실전4] 리뷰웹 3. API 가져오기 (0) | 2021.04.21 |
|---|---|
| [장고 실전4] 리뷰웹 2. MariaDB 연동하기 (SecretKey 외부파일 만들기) (0) | 2021.04.09 |
| [에러 해결] Auto-created primary key used when not defiing a primary key type, by default 'django.db.models.AutoField'. (0) | 2021.04.09 |
| [장고 실전4] 리뷰웹 1. MariaDB 연동하기 (0) | 2021.04.09 |
| [장고 실전3] 8. 커뮤니티 : 게시글 페이지만들기 (0) | 2021.04.09 |


